How to: Retrofitting projectors
Tools/Materials:
Dremel tool
Sanding drums for dremel
Rotozip bits for dremel
Flat blade screwdrivers
Philips screwdriver
Clear silicone sealant
8 3” screws
Box of nuts for screws
Electrical tape
Epoxy/glue (like jb weld)
Shop towels
A brain
Step one: take your headlights out of your car…DUH!
Step two: you need to take your headlights apart. If your headlights are like 90% of the newer ones out there, you can just bake them in the oven to get them apart. This will loosen the glue between the front clear lens and the rear of the housing. Personally, I would heat the oven to 260 degrees, and put 1 headlight on the middle rack at a time. Leave it in there for no more than 7 minutes. You don’t want to leave it too close to the heat source, that is, unless you want your headlights to melt.
Step three: once you take the headlight out of the oven (using oven mitts- it will be HOT!) place the headlight on a safe non-slip surface. Use 2 rather large flat blade screwdrivers to pry apart the headlights. Stick one screwdriver in between the lens and the back of the housing and pry it apart. Once you get the first pry in, work around the headlight with the 2nd screwdriver. Once the lens is pretty loose, you can just pull it off (still being careful not to burn yourself)
Step four: at this point you should be looking at you headlight with the front lens off, the trim inside the headlight is probably attached to the lens. You should put that aside so you don’t scratch it up or anything with any tools. This is a good time to paint the trim and clean the inside/outside of the front lens. Try not to get anything on the glue left on the lens.
Step five: look the rear of the housing with the halogen reflector still in it. There should be a couple aiming screws on the back of the housing. Most of them use either a screwdriver, or an Allen wrench to adjust them. You’re going to want to get the reflector out of the housing completely so you can retrofit it. This is where the aiming screws come in. you want to back out those all the way so that eventually the reflector will just completely come out of the back of the housing. They basically just work like big screws, so un-do ‘em.
Step six: put the halogen reflector aside and pick up your projector that you’ll be using. In this case the projector being used is a E55 Bi-xenon made by Hella. Your going to want to put screws through the pre-existing holes in the projector body. I usually use 3” screws so that they’re always long enough and if they’re too long, you can always trim them down. Put the screws through the front, and then put a nut behind the hole in the projector to hold the screws in place so they don’t wobble around. See the pictures for reference. Ignore the other nuts farther down, and the electrical tape for now.
http://img.photobucket.com/albums/v129/Scu..._how_to_001.jpg
http://img.photobucket.com/albums/v129/Scu..._how_to_005.jpg
http://img.photobucket.com/albums/v129/Scu..._how_to_003.jpg
Step seven: your are now going to be making a template of where the screw holes should go in the halogen reflector. This way, you can align the template so that the holes will be level and you wont have a cock-eyed beam pattern. With the screws tightened down on the projector body, place the projector sitting on the screws onto a piece of sturdy cardboard. Carefully mark where each of the screws sit on the cardboard with a marker, making sure not to bump the projector around as you do it. Then, once all of the spots are marked, connect the dots and the cut out the template. It ends up so that each corner of the template marks where each hole should be drilled into the old reflector. Your template should come out something like the one in the picture. Also- (not seen in the picture) poke a hole in the exact middle of the template with a pencil or something so you know where the bulb holder will be on the projector in relation to the screws.
http://img.photobucket.com/albums/v129/Scu..._how_to_007.jpg
step eight: take your finished template and your old halogen reflector in hand. Align the template so that it is horizontally and vertically straight. Usually, reflectors will have lines molded into them that run horizontally. Its usually easier to line the template up with these lines. Its important to line up the hole that you poked in the center of your template in the previous step with the hole in the reflector where the old bulb went though. Make sure the center of the hole in the template is in the center of the hole for the bulb. Once you’ve got things all aligned, mark on the reflector with a black permanent marker at the corners of the template (where the screw holes will go)
http://img.photobucket.com/albums/v129/Scu..._how_to_008.jpg
Also note that the reflector is already painted black, this reduces glare inside of the housing.
Step nine: first, draw a centerline in the top/back of the halogen reflector starting from the center of the hole where the halogen bulb would go, all the way to the front of the top of the reflector. This will come into play later. Next, bust out your handy dremel tool with the rotozip bit installed in it. Take the reflector that you just marked on as to where the holes should be, and drill them out. Make them only slightly larger than the diameter of the screws so you have a millimeter or 2 for play room. After the holes are drilled, they should visually be straight, if they are not- something’s wrong. After the 4 holes are drilled out, cut out the center of the reflector where the halogen bulb would normally plug into the reflector. Make the hole big enough so that the new bulb holder on the projector can fit through there. Be careful not to cut the hole too close to the holes you just drilled though. You don’t want to make the area very weak or anything. You can also make an extra small hole in the bottom corner as pictured if you have a bixenon projector and need a place to route the wiring for the solenoid through.
At this point your reflector should look something like this (black or not)
http://img.photobucket.com/albums/v129/Scu..._how_to_009.jpg
step ten: this can be a little tricky, but its important. It relates back to the electrical tape and extra nuts as mentioned in step six. Put an extra nut on each of the screws attached to the projector, screw them pretty far towards the nuts that are already on there, but don’t make them tight or anything. Now, put the projector with all of the hardware on it into your newly modified reflector. Make sure that the projector looks level etc. put the projector in a position so that the lens is pointing slightly- I mean very very slightly upwards. Also, make sure that the center of the front lens on the projector is in line with the centerline you drew earlier in step 9. Stick your hand in there and back the nuts back out so that they lightly touch the reflector. These will prevent the projector from moving back and forth etc in the housing over time.
Step eleven: take the projector back out of the reflector (being careful not to move the nuts you just backed out to touch the reflector) then, you will put long strips of electrical tape across the screws so that the nuts don’t move around on the screw and make them relatively tight. This also helps with some vibration damping. You can also back 2 nuts up against each other to keep them in place if you wish. At this point your projector setup should look a little like this:
http://img.photobucket.com/albums/v129/Scu..._how_to_001.jpg
The last 2 steps can be a little confusing, but just read over them a couple times. Its pretty much common sense on how you want it all to be aimed. Obviously you don’t want the projector to be aimed down and to the left.
Step twelve: your ready to permanently place the projector onto the reflector. Put it back through the modified reflector once again making sure its all looking aligned. At this point, you can put nuts on the back of the screws and moderately tighten them down. You don’t want to tighten them too hard and risk cracking the plastic reflector. That’d be bad.
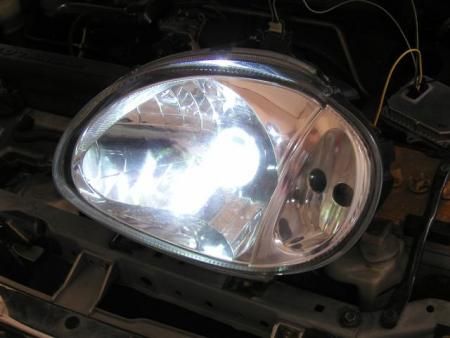
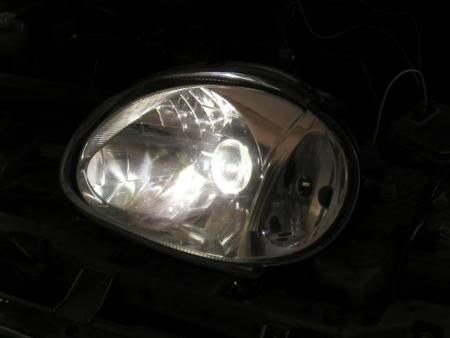
Heres where you should be at now:
http://img.photobucket.com/albums/v129/Scu..._how_to_012.jpg
http://img.photobucket.com/albums/v129/Scu..._how_to_013.jpg
http://img.photobucket.com/albums/v129/Scu..._how_to_014.jpg
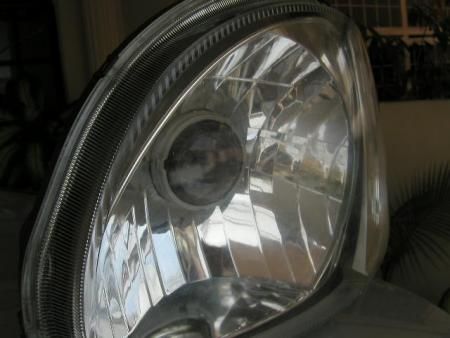
Step thirteen: your getting there! Keep going. Look at the back of the housing with the projectors bulb holder sticking out and the screws sticking out with the nuts tightened on the end of them. Time to do a little cleaning up and sealing. Put some electrical tape over the excess space around the bulb holder to keep moisture from traveling inside there. Be plentiful with it. Also, put either some glue, epoxy, or back together the nuts on the back of the screws so that they don’t vibrate loose over time. At this point you can also trim down the excess length of the screws with your heavy duty cutting discs and the dremel. Be careful b/c they get hot, and lots of sparks fly all over. Also- don’t worry about the looks of this. Nobody will EVER see it.
http://img.photobucket.com/albums/v129/Scu..._how_to_017.jpg
Step fourteen: (assuming you have already mounted your shrouds- all are different so I'm not even gonna go into that) you are ready to put the reflector with the projector mounted on it back into the housing. Put the aiming screws back into their respective holes in the back of the housing, and re-screw them in. for the time being until you can get the headlights actually mounted back on the car, just leave the aiming screws in about ½ way.
Step fifteen: paint any trim inside the headlight you want, clean the lens on the projector, and clean the lens for the front of the headlight inside and out. Put the lens/trim back onto the front of the headlight in its relative position. Put the whole housing back into the oven (260 degrees for 5-7 minutes) to re-melt the glue. When it comes out, press the housing back together (being careful because it’ll be hot). You can use some pliers or small clamps to push the front lens back on. Once it cools down, you can put a bead of clear silicone sealant around it to insure a good seal. The sealant should take about a day to dry. Also note that sometimes the silicone sealant shrinks a little when it dries, so you may need to add a little more later on.
Step sixteen: my personal favorite, put some high quality shop towels in the rear hole of the housing to absorb any small amounts of moisture that gets into the back of the housing created by the imperfect seal that sometimes occur. You can also try and fabricate some sort of new seal using some PVC materials.
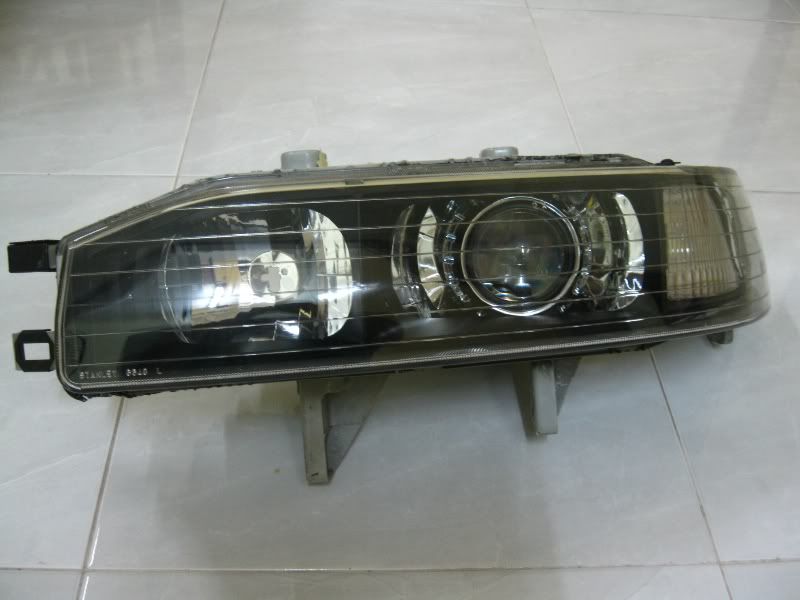
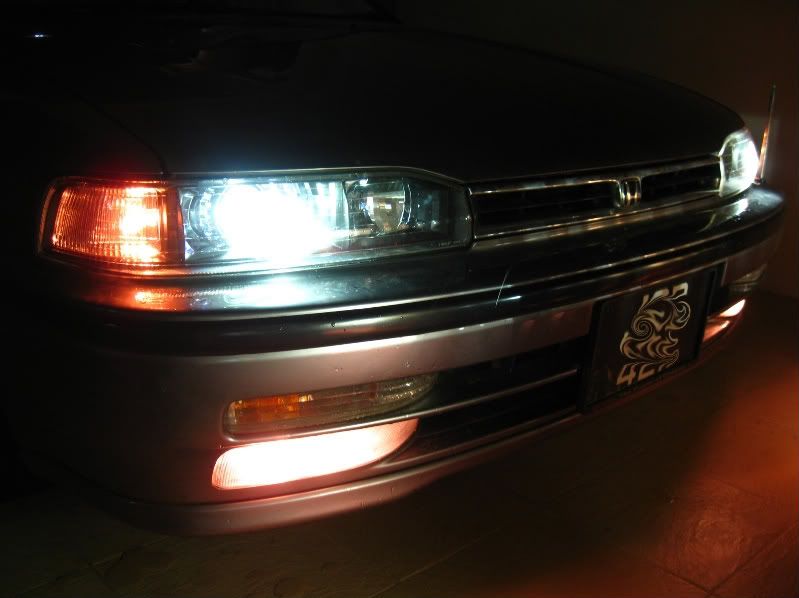
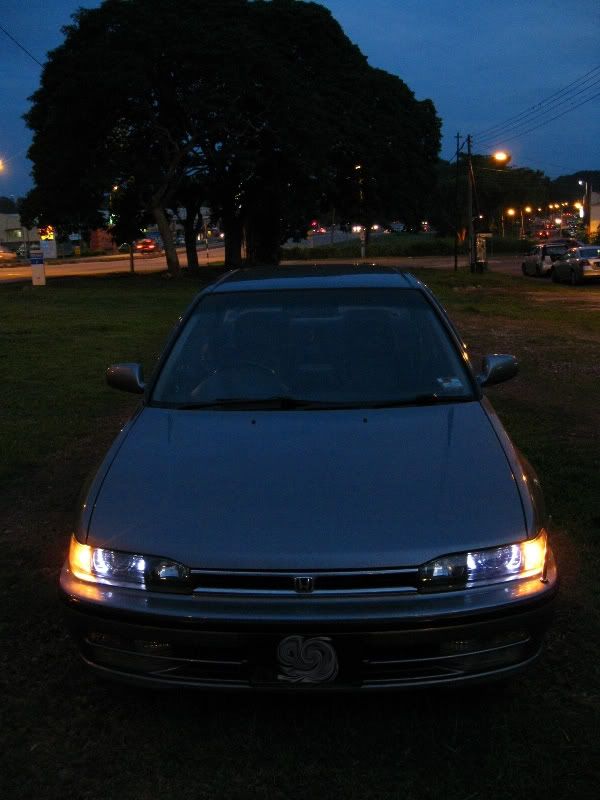
YOU’RE DONE! Well at least with the basics. This should give you a good idea of how to do everything when it comes to retrofitting. Obviously I didn’t touch on all subjects because every housing/projector is a little different. Just use common sense, don’t be scared. Its not really thaaaat bad. Look for the wire harness edition coming out soon.
Complete Project.


Tools/Materials:
Dremel tool
Sanding drums for dremel
Rotozip bits for dremel
Flat blade screwdrivers
Philips screwdriver
Clear silicone sealant
8 3” screws
Box of nuts for screws
Electrical tape
Epoxy/glue (like jb weld)
Shop towels
A brain
Step one: take your headlights out of your car…DUH!
Step two: you need to take your headlights apart. If your headlights are like 90% of the newer ones out there, you can just bake them in the oven to get them apart. This will loosen the glue between the front clear lens and the rear of the housing. Personally, I would heat the oven to 260 degrees, and put 1 headlight on the middle rack at a time. Leave it in there for no more than 7 minutes. You don’t want to leave it too close to the heat source, that is, unless you want your headlights to melt.
Step three: once you take the headlight out of the oven (using oven mitts- it will be HOT!) place the headlight on a safe non-slip surface. Use 2 rather large flat blade screwdrivers to pry apart the headlights. Stick one screwdriver in between the lens and the back of the housing and pry it apart. Once you get the first pry in, work around the headlight with the 2nd screwdriver. Once the lens is pretty loose, you can just pull it off (still being careful not to burn yourself)
Step four: at this point you should be looking at you headlight with the front lens off, the trim inside the headlight is probably attached to the lens. You should put that aside so you don’t scratch it up or anything with any tools. This is a good time to paint the trim and clean the inside/outside of the front lens. Try not to get anything on the glue left on the lens.
Step five: look the rear of the housing with the halogen reflector still in it. There should be a couple aiming screws on the back of the housing. Most of them use either a screwdriver, or an Allen wrench to adjust them. You’re going to want to get the reflector out of the housing completely so you can retrofit it. This is where the aiming screws come in. you want to back out those all the way so that eventually the reflector will just completely come out of the back of the housing. They basically just work like big screws, so un-do ‘em.
Step six: put the halogen reflector aside and pick up your projector that you’ll be using. In this case the projector being used is a E55 Bi-xenon made by Hella. Your going to want to put screws through the pre-existing holes in the projector body. I usually use 3” screws so that they’re always long enough and if they’re too long, you can always trim them down. Put the screws through the front, and then put a nut behind the hole in the projector to hold the screws in place so they don’t wobble around. See the pictures for reference. Ignore the other nuts farther down, and the electrical tape for now.
http://img.photobucket.com/albums/v129/Scu..._how_to_001.jpg
http://img.photobucket.com/albums/v129/Scu..._how_to_005.jpg
http://img.photobucket.com/albums/v129/Scu..._how_to_003.jpg
Step seven: your are now going to be making a template of where the screw holes should go in the halogen reflector. This way, you can align the template so that the holes will be level and you wont have a cock-eyed beam pattern. With the screws tightened down on the projector body, place the projector sitting on the screws onto a piece of sturdy cardboard. Carefully mark where each of the screws sit on the cardboard with a marker, making sure not to bump the projector around as you do it. Then, once all of the spots are marked, connect the dots and the cut out the template. It ends up so that each corner of the template marks where each hole should be drilled into the old reflector. Your template should come out something like the one in the picture. Also- (not seen in the picture) poke a hole in the exact middle of the template with a pencil or something so you know where the bulb holder will be on the projector in relation to the screws.
http://img.photobucket.com/albums/v129/Scu..._how_to_007.jpg
step eight: take your finished template and your old halogen reflector in hand. Align the template so that it is horizontally and vertically straight. Usually, reflectors will have lines molded into them that run horizontally. Its usually easier to line the template up with these lines. Its important to line up the hole that you poked in the center of your template in the previous step with the hole in the reflector where the old bulb went though. Make sure the center of the hole in the template is in the center of the hole for the bulb. Once you’ve got things all aligned, mark on the reflector with a black permanent marker at the corners of the template (where the screw holes will go)
http://img.photobucket.com/albums/v129/Scu..._how_to_008.jpg
Also note that the reflector is already painted black, this reduces glare inside of the housing.
Step nine: first, draw a centerline in the top/back of the halogen reflector starting from the center of the hole where the halogen bulb would go, all the way to the front of the top of the reflector. This will come into play later. Next, bust out your handy dremel tool with the rotozip bit installed in it. Take the reflector that you just marked on as to where the holes should be, and drill them out. Make them only slightly larger than the diameter of the screws so you have a millimeter or 2 for play room. After the holes are drilled, they should visually be straight, if they are not- something’s wrong. After the 4 holes are drilled out, cut out the center of the reflector where the halogen bulb would normally plug into the reflector. Make the hole big enough so that the new bulb holder on the projector can fit through there. Be careful not to cut the hole too close to the holes you just drilled though. You don’t want to make the area very weak or anything. You can also make an extra small hole in the bottom corner as pictured if you have a bixenon projector and need a place to route the wiring for the solenoid through.
At this point your reflector should look something like this (black or not)
http://img.photobucket.com/albums/v129/Scu..._how_to_009.jpg
step ten: this can be a little tricky, but its important. It relates back to the electrical tape and extra nuts as mentioned in step six. Put an extra nut on each of the screws attached to the projector, screw them pretty far towards the nuts that are already on there, but don’t make them tight or anything. Now, put the projector with all of the hardware on it into your newly modified reflector. Make sure that the projector looks level etc. put the projector in a position so that the lens is pointing slightly- I mean very very slightly upwards. Also, make sure that the center of the front lens on the projector is in line with the centerline you drew earlier in step 9. Stick your hand in there and back the nuts back out so that they lightly touch the reflector. These will prevent the projector from moving back and forth etc in the housing over time.
Step eleven: take the projector back out of the reflector (being careful not to move the nuts you just backed out to touch the reflector) then, you will put long strips of electrical tape across the screws so that the nuts don’t move around on the screw and make them relatively tight. This also helps with some vibration damping. You can also back 2 nuts up against each other to keep them in place if you wish. At this point your projector setup should look a little like this:
http://img.photobucket.com/albums/v129/Scu..._how_to_001.jpg
The last 2 steps can be a little confusing, but just read over them a couple times. Its pretty much common sense on how you want it all to be aimed. Obviously you don’t want the projector to be aimed down and to the left.
Step twelve: your ready to permanently place the projector onto the reflector. Put it back through the modified reflector once again making sure its all looking aligned. At this point, you can put nuts on the back of the screws and moderately tighten them down. You don’t want to tighten them too hard and risk cracking the plastic reflector. That’d be bad.
Heres where you should be at now:
http://img.photobucket.com/albums/v129/Scu..._how_to_012.jpg
http://img.photobucket.com/albums/v129/Scu..._how_to_013.jpg
http://img.photobucket.com/albums/v129/Scu..._how_to_014.jpg
Step thirteen: your getting there! Keep going. Look at the back of the housing with the projectors bulb holder sticking out and the screws sticking out with the nuts tightened on the end of them. Time to do a little cleaning up and sealing. Put some electrical tape over the excess space around the bulb holder to keep moisture from traveling inside there. Be plentiful with it. Also, put either some glue, epoxy, or back together the nuts on the back of the screws so that they don’t vibrate loose over time. At this point you can also trim down the excess length of the screws with your heavy duty cutting discs and the dremel. Be careful b/c they get hot, and lots of sparks fly all over. Also- don’t worry about the looks of this. Nobody will EVER see it.
http://img.photobucket.com/albums/v129/Scu..._how_to_017.jpg
Step fourteen: (assuming you have already mounted your shrouds- all are different so I'm not even gonna go into that) you are ready to put the reflector with the projector mounted on it back into the housing. Put the aiming screws back into their respective holes in the back of the housing, and re-screw them in. for the time being until you can get the headlights actually mounted back on the car, just leave the aiming screws in about ½ way.
Step fifteen: paint any trim inside the headlight you want, clean the lens on the projector, and clean the lens for the front of the headlight inside and out. Put the lens/trim back onto the front of the headlight in its relative position. Put the whole housing back into the oven (260 degrees for 5-7 minutes) to re-melt the glue. When it comes out, press the housing back together (being careful because it’ll be hot). You can use some pliers or small clamps to push the front lens back on. Once it cools down, you can put a bead of clear silicone sealant around it to insure a good seal. The sealant should take about a day to dry. Also note that sometimes the silicone sealant shrinks a little when it dries, so you may need to add a little more later on.
Step sixteen: my personal favorite, put some high quality shop towels in the rear hole of the housing to absorb any small amounts of moisture that gets into the back of the housing created by the imperfect seal that sometimes occur. You can also try and fabricate some sort of new seal using some PVC materials.
YOU’RE DONE! Well at least with the basics. This should give you a good idea of how to do everything when it comes to retrofitting. Obviously I didn’t touch on all subjects because every housing/projector is a little different. Just use common sense, don’t be scared. Its not really thaaaat bad. Look for the wire harness edition coming out soon.
Complete Project.