
Hi Folks ! :wavey:
I upgraded my car rims recently from 14" to 15" Width size? See it yourself:
(Photo courtesy of Stupidcar - those are his feet)
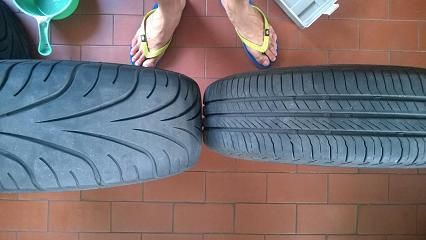
The size increased from 175 to 205 and inevitably this caused the road noise in my car cabin be well, noisier.
Some of you might have already read my previous DIY post on my car NVH Insulation. Well you can revisit the thread here for reference:
http://www.zerotohundred.com/newforums/do-it-yourself-garage/428346-nvh-diy-and-tested.html
Ok so this new set of shoes for my car is really noisy but grips like a stubborn ant on your windscreen even you are doing 200kmh. But how noisy is it?
Lets do a comparison:
1. Stock insulation at 60kmh = 72dBA, Max 74dBA
After insulating whole car = 70dBA, Max 77dBA
After changing to 205 tyre = 71dBA, Max 78dBA
2. Stock insulation at 110kmh = 74dBA, Max 84dBA
After insulating whole car = 69dBA, Max 81dBA
After changing to 205 tyre = 77dBA, Max 89dBA
Yes! It is very noisy.
So time for some wheel arc insulation babeh !
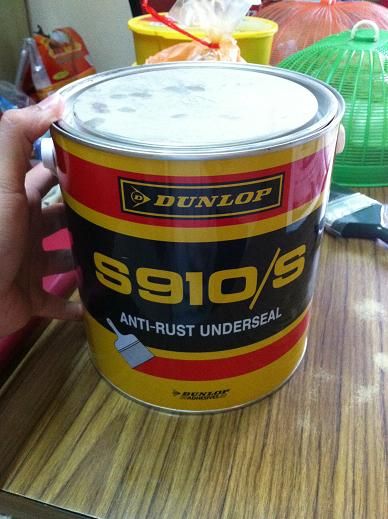
1. I bought this Dunlop Bituminous adhesive for RM30 at hardware shop. This is a 4L can. ACE Hardware is selling 1L can for RM12.90
2. Jack up the car. Important! - use a jackstand to support the car.
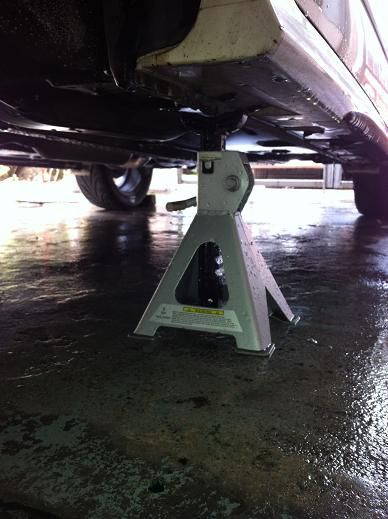
3. Take out the wheels and clean the wheel arc
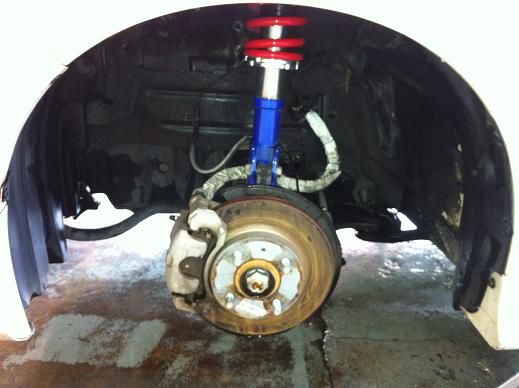
Make sure it is clean and free from dirt, grime, grease, or any kind of shit.
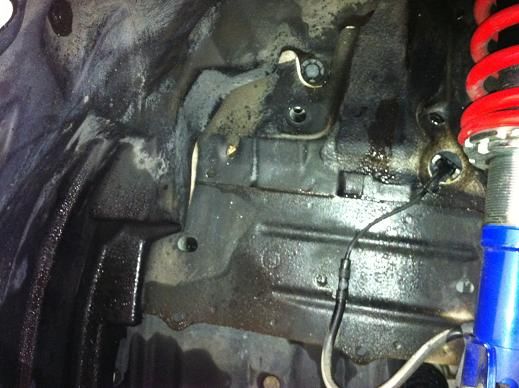
4. Use a paint brush, apply the insulation just like painting the wall
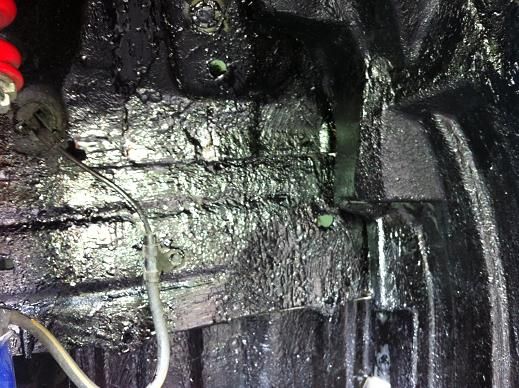
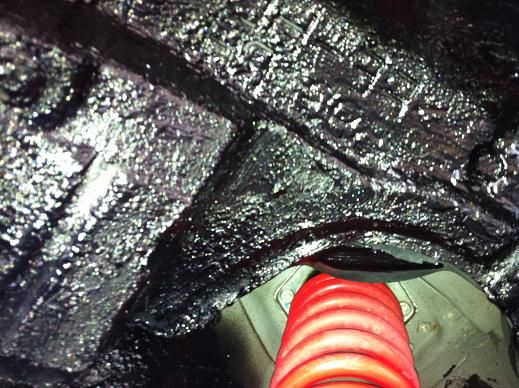
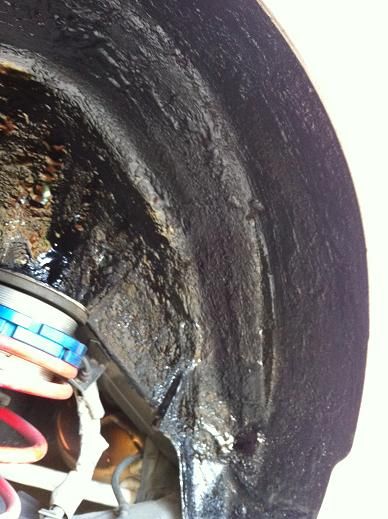
I apply 1 thick coat, followed by a second thin coat to even things out. This thing dries up and hardens pretty quick.
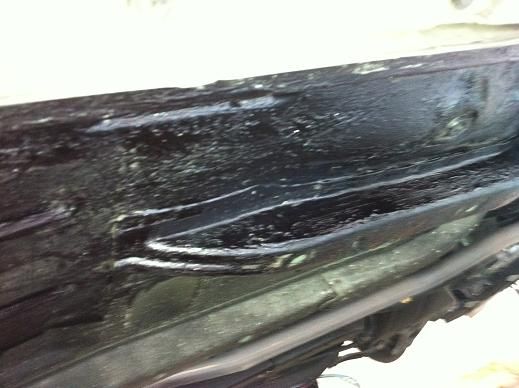
5. Meanwhile, you can also apply the underneath of the car. Just dont apply at area which is too near to the exhaust because bitumen is flammable.
Time for some readings! I used the same route as Insulation Part 1. The jalan kuching then duke highway.
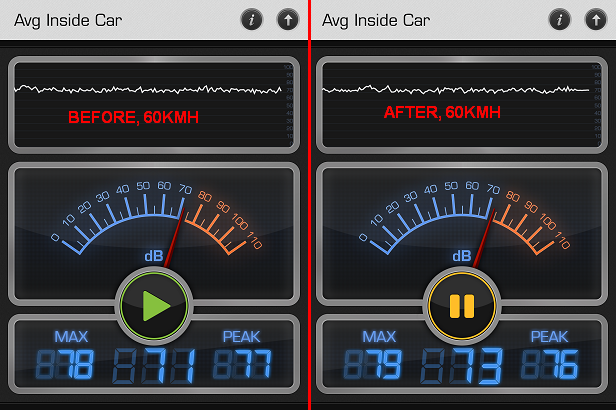
1. At 60kmh,
2. At 90kmh,

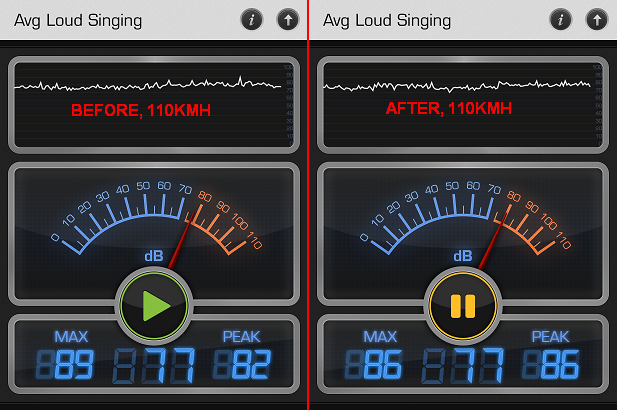
3. At 110kmh
Conclusion: At 60kmh, the noise data after insulation is even greater. How could this be? Well because at that speed, the main noise is not from the tyre (passing car, motorbike preeet preet preeet~, people honking, etc)
At 90kmh, we can see that the average noise is same, but the max is lower by 1dBA. Notice that in the middle of the graph, the noise is lower. That could means that at that period there wasnt any outer interference.
At 110kmh, this is where the noise is significantly reduced. While the average reading is the same at 77dBA, the max reading is reduced to 86dBA.
I can conclude that the reduction is only somewhere around 1-2dBA. Which is not bad for RM30. To the ears the noise reduction is greater than the readings because I can clearly notice that the humming sound of tyre is significantly reduced especially when coming to a stop from high speed.
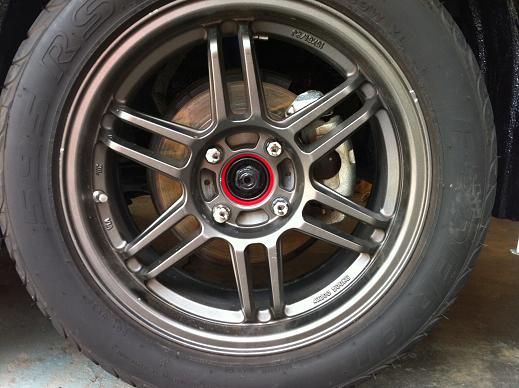
Meanwhile....when I took off my rims to apply the insulation, I did this...
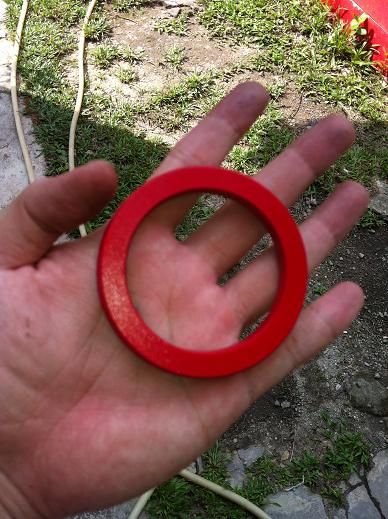
This is my rims center cone. Originally it is metal colour (shiny with some rusty colour). I sprayed it with 2 layers of red and 1 layer of clear lacquer and this is the result - tadah ~ I plastidipped the center with black dip too.
Thanks for reading and happy DIY
I upgraded my car rims recently from 14" to 15"
Width size? See it yourself:(Photo courtesy of Stupidcar - those are his feet)
The size increased from 175 to 205 and inevitably this caused the road noise in my car cabin be well, noisier.
Some of you might have already read my previous DIY post on my car NVH Insulation. Well you can revisit the thread here for reference:
http://www.zerotohundred.com/newforums/do-it-yourself-garage/428346-nvh-diy-and-tested.html
Ok so this new set of shoes for my car is really noisy but grips like a stubborn ant on your windscreen even you are doing 200kmh. But how noisy is it?
Lets do a comparison:
1. Stock insulation at 60kmh = 72dBA, Max 74dBA
After insulating whole car = 70dBA, Max 77dBA
After changing to 205 tyre = 71dBA, Max 78dBA
2. Stock insulation at 110kmh = 74dBA, Max 84dBA
After insulating whole car = 69dBA, Max 81dBA
After changing to 205 tyre = 77dBA, Max 89dBA
Yes! It is very noisy.
So time for some wheel arc insulation babeh !
1. I bought this Dunlop Bituminous adhesive for RM30 at hardware shop. This is a 4L can. ACE Hardware is selling 1L can for RM12.90
2. Jack up the car. Important! - use a jackstand to support the car.
3. Take out the wheels and clean the wheel arc
Make sure it is clean and free from dirt, grime, grease, or any kind of shit.
4. Use a paint brush, apply the insulation just like painting the wall
I apply 1 thick coat, followed by a second thin coat to even things out. This thing dries up and hardens pretty quick.
5. Meanwhile, you can also apply the underneath of the car. Just dont apply at area which is too near to the exhaust because bitumen is flammable.
Time for some readings! I used the same route as Insulation Part 1. The jalan kuching then duke highway.
1. At 60kmh,
2. At 90kmh,
3. At 110kmh
Conclusion: At 60kmh, the noise data after insulation is even greater. How could this be? Well because at that speed, the main noise is not from the tyre (passing car, motorbike preeet preet preeet~, people honking, etc)
At 90kmh, we can see that the average noise is same, but the max is lower by 1dBA. Notice that in the middle of the graph, the noise is lower. That could means that at that period there wasnt any outer interference.
At 110kmh, this is where the noise is significantly reduced. While the average reading is the same at 77dBA, the max reading is reduced to 86dBA.
I can conclude that the reduction is only somewhere around 1-2dBA. Which is not bad for RM30
. To the ears the noise reduction is greater than the readings because I can clearly notice that the humming sound of tyre is significantly reduced especially when coming to a stop from high speed. Meanwhile....when I took off my rims to apply the insulation, I did this...
This is my rims center cone. Originally it is metal colour (shiny with some rusty colour). I sprayed it with 2 layers of red and 1 layer of clear lacquer and this is the result - tadah ~ I plastidipped the center with black dip too.
Thanks for reading and happy DIY

