

In responding to one of the forumer request, I am posting this simple step by step on how to adjust your Ignition Timing to factory setting (10 deg) without the aid of the Timing Gun. The result is not exactly 10, but would be around 9~11, which is good enough for a regular user.
Here you go ~
1) Start your engine
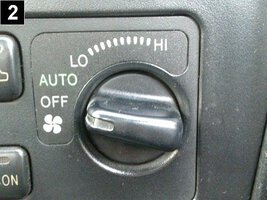
2) Turn off all electrical load (air con, amp, etc)
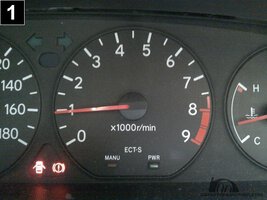
3) Wait till the engine reach working temperature (1/3 of full scale)
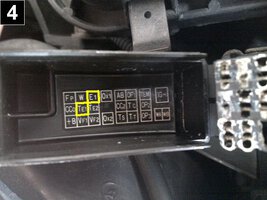
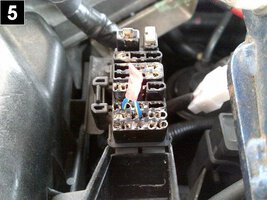
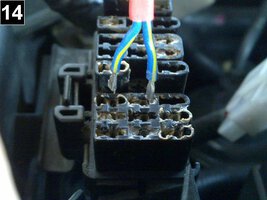
4) Locate your diagnostic connector, and look for terminal "TE1" and "E1"
5) Use a short wire, jump TE1 and E1 (WARNING: DO NOT JUMP OTHER TERMINALS!)
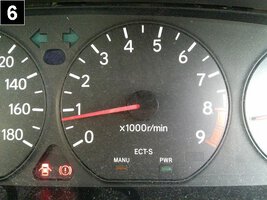
6) The idling will move up to ~1200rpm for about 1 sec, then down to 800rpm
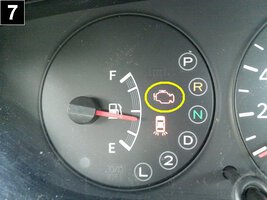
7) The engine check light will be blinking continuously. If it pause intermittence, it mean you have error code store in your ECU. You may want to read the error code and resolve the problem later
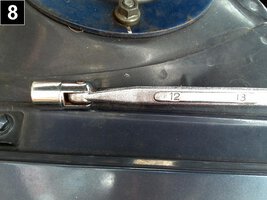
8) Get a 12mm box spanner
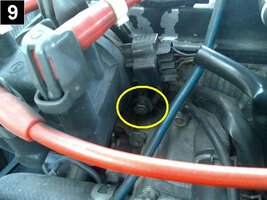
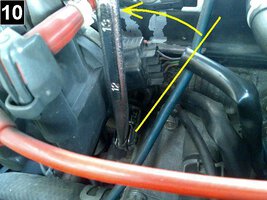
9) Locate the hex nut right under the Distributor
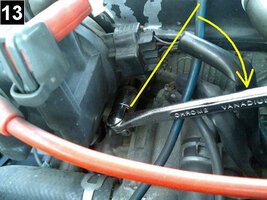
10) Use the spanner, loosen the hex nut
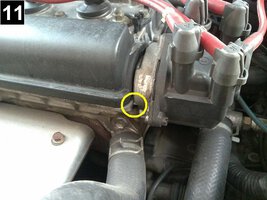
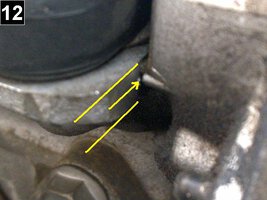
11) Turn the distributor and observe the “pointer” ’s position
12) For SVT, position the “pointer” at 2/3 (from the bottom) of the thickness of the surface (where the head cover sitting on). For BT, position it at 3/5 from the bottom. The higher the position, the more advance timing you will get.
13) Tighten the hex nut
14) Remove the jumper
That’s it. Happy DIY!
P/S: you may want to try at different timing to get better pick up and with lesser knocking.
Here you go ~
1) Start your engine
2) Turn off all electrical load (air con, amp, etc)
3) Wait till the engine reach working temperature (1/3 of full scale)
4) Locate your diagnostic connector, and look for terminal "TE1" and "E1"
5) Use a short wire, jump TE1 and E1 (WARNING: DO NOT JUMP OTHER TERMINALS!)
6) The idling will move up to ~1200rpm for about 1 sec, then down to 800rpm
7) The engine check light will be blinking continuously. If it pause intermittence, it mean you have error code store in your ECU. You may want to read the error code and resolve the problem later
8) Get a 12mm box spanner
9) Locate the hex nut right under the Distributor
10) Use the spanner, loosen the hex nut
11) Turn the distributor and observe the “pointer” ’s position
12) For SVT, position the “pointer” at 2/3 (from the bottom) of the thickness of the surface (where the head cover sitting on). For BT, position it at 3/5 from the bottom. The higher the position, the more advance timing you will get.
13) Tighten the hex nut
14) Remove the jumper
That’s it. Happy DIY!
P/S: you may want to try at different timing to get better pick up and with lesser knocking.
Attachments
-
 40.7 KB Views: 184
 -
 63.4 KB Views: 119
 -
 40.2 KB Views: 112
 -
 51.6 KB Views: 151
 -
 62.1 KB Views: 139
 -
 63.2 KB Views: 116
 -
 49.4 KB Views: 135
 -
 52 KB Views: 131
 -
 58.5 KB Views: 176
 -
 62.7 KB Views: 168
 -
 52 KB Views: 202
 -
 46.8 KB Views: 184
 -
 64.5 KB Views: 156
 -
 49 KB Views: 159
Last edited:
