
- Joined
- Mar 3, 2005
- Messages
- 8,210
- Points
- 5,213
Below is a simple guide on cleaning and PnP your TB...
My TB was due for service since it's never been properly clean before..previous ways was just to spray some cleaner to clean it so I went back early after work to clean and PnP the TB myself.
What you need:
1. Engine cleaner or degreaser x 3 cans...any brand will do..I use to 3in1 cleaner with the lemon citrus scent but this cleaner is quite harsh on the hands....I skin was dried and itchy after I finish the job so better wear a glove...
2. Appropriate tools (depending on car make)...mine mostly are torque screw...
3. tooth brush
4. old cloth 3 pcs will do
5. a small container to soak some smaller parts in the cleaner.
6. old newspaper
7. Autosol or any mag or Alum polish or compound
8. sand paper..you will need a few grit...this is my choice
100
240
360
1500
2000
9. Lots of patience & elbow grease....
If you are not confident in using a Dremel to do the PnP this is the way...of course it's consumes a lot of time.
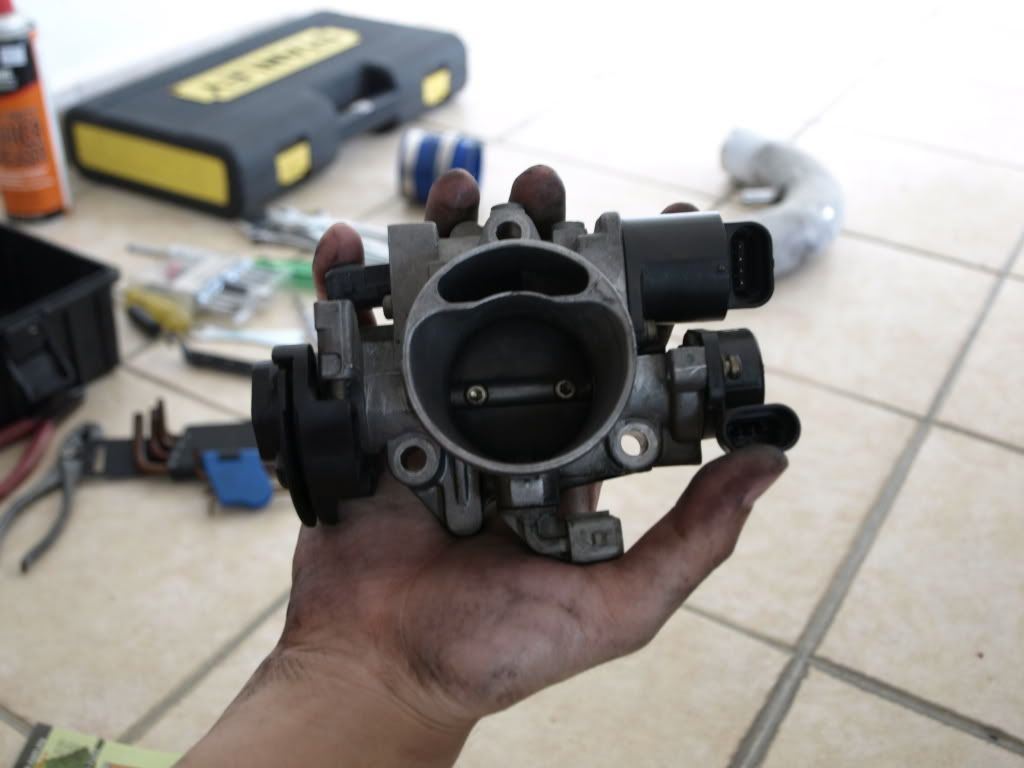
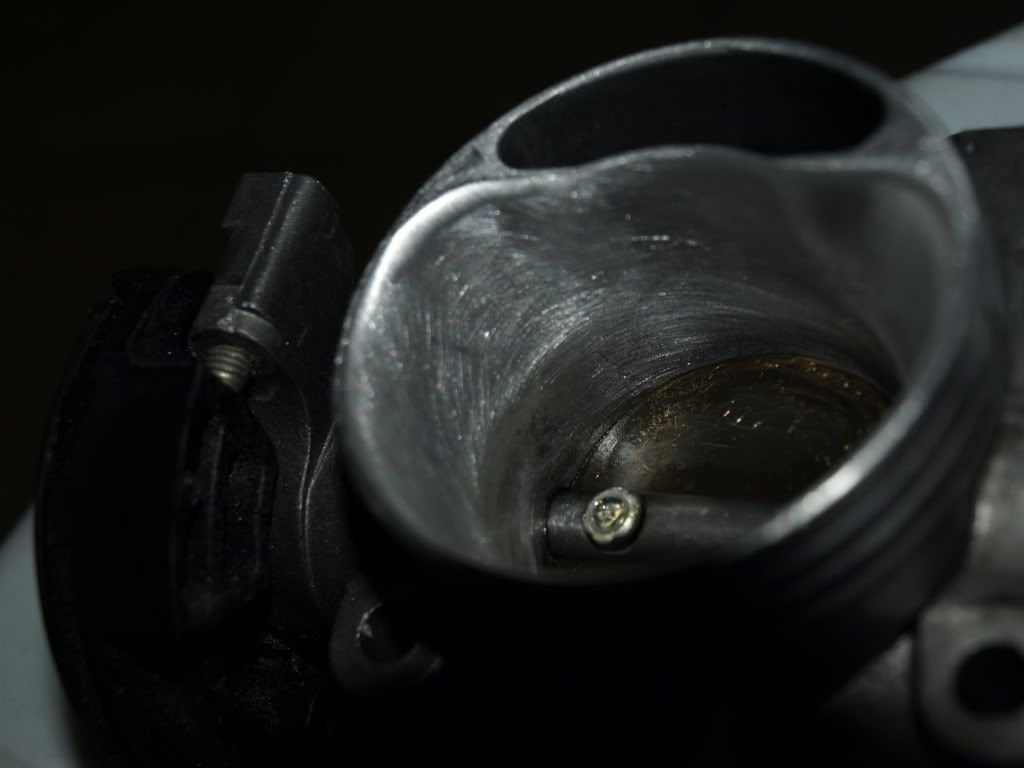
How the TB looks like before cleaning and PnP...dirty and the inner surface of the intake is rough and I saw some bumps here and there some ridges...
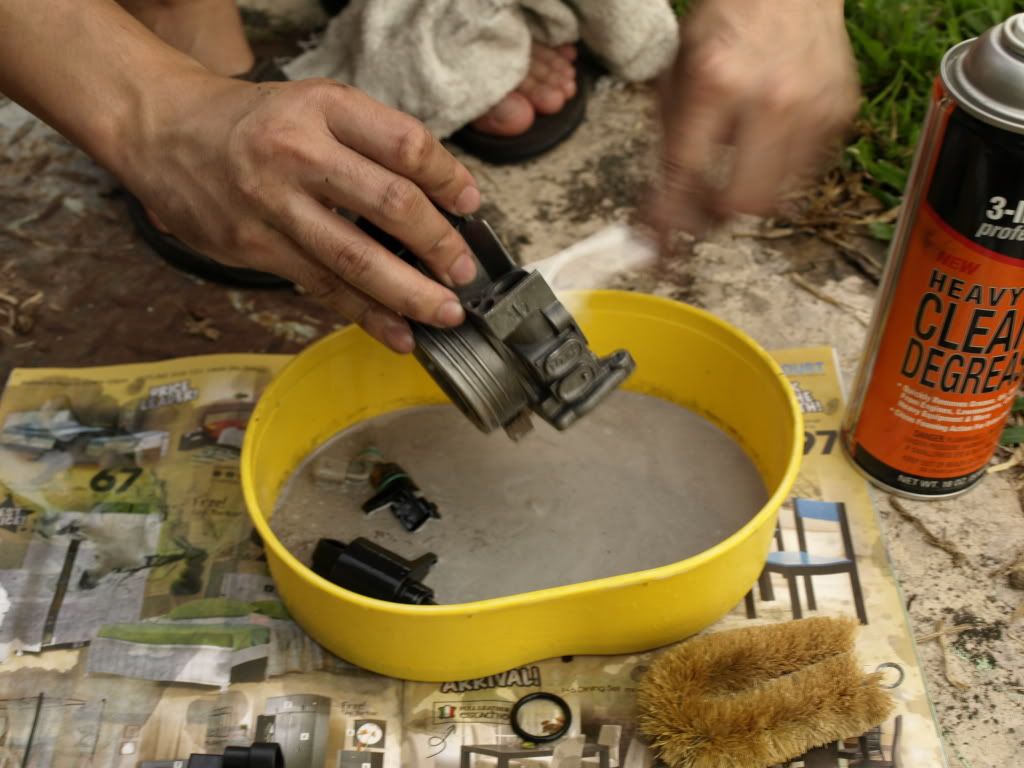
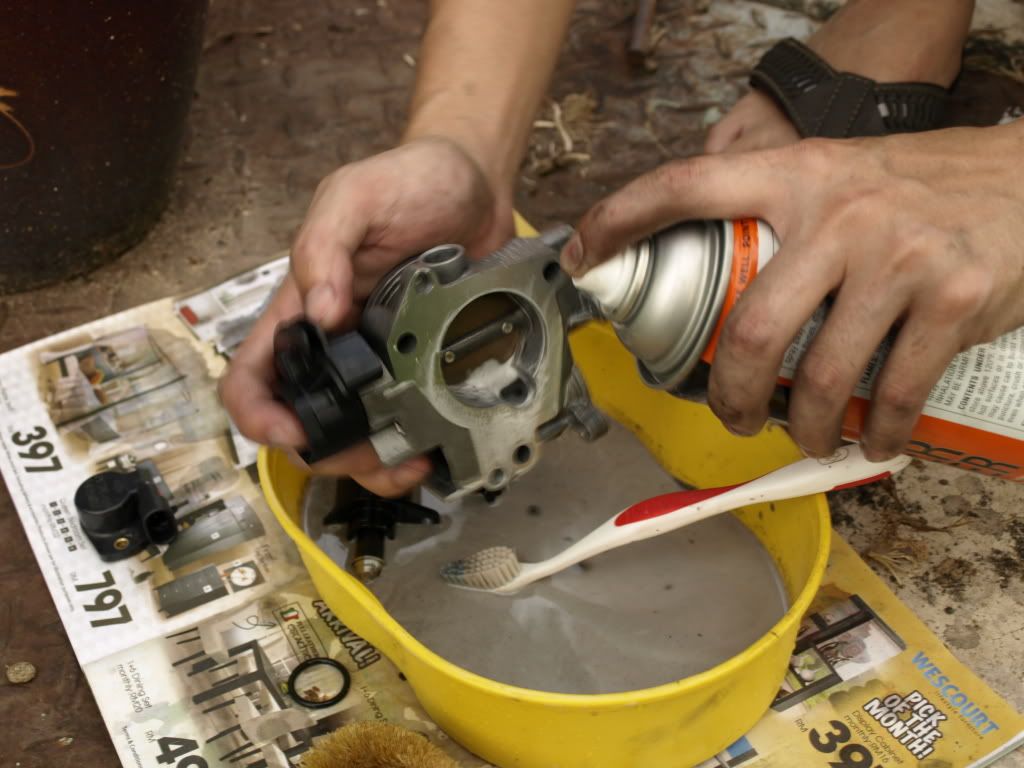
The cleaning process...before cleaning, take out all those sensors attached to the TB to thoroughly clean all the parts and the sensors.
The porting & polish process
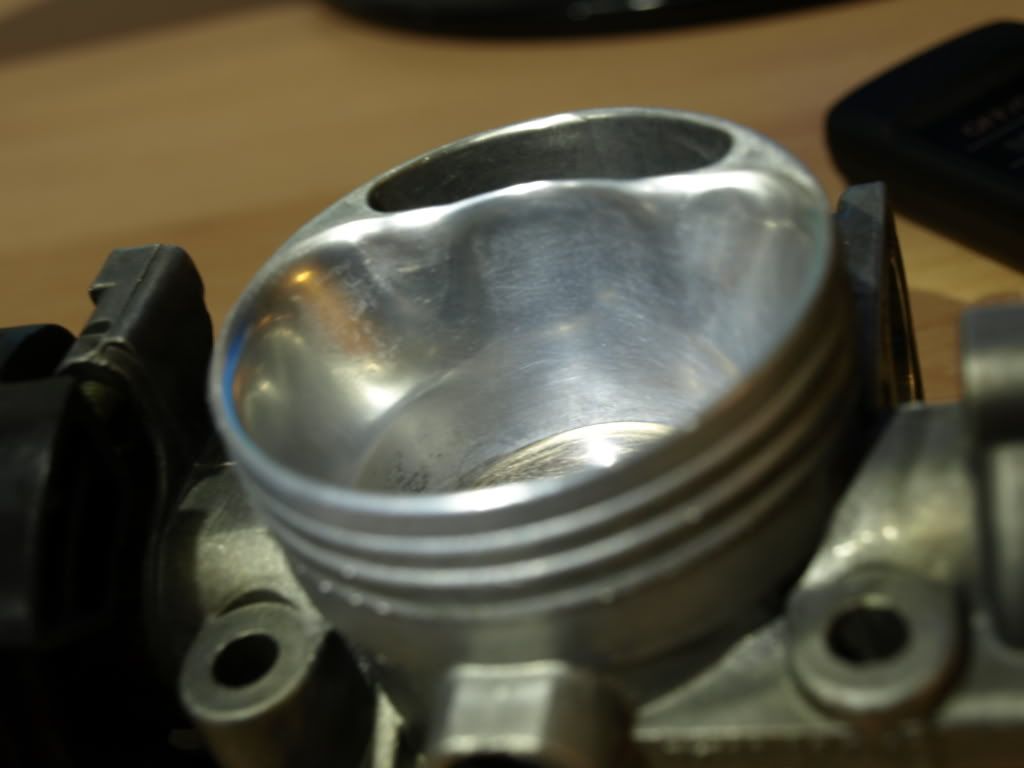
Starting with the 100 grit. you can see all the sanded marks....use this 100 to sand out bumps and ridges...then work your way down to finer sand papers until all you feel is smooth surface. For the idle control tunnel..I just did some light porting as I don't want to mess up the idling
Close of view of after 100 grit sanding
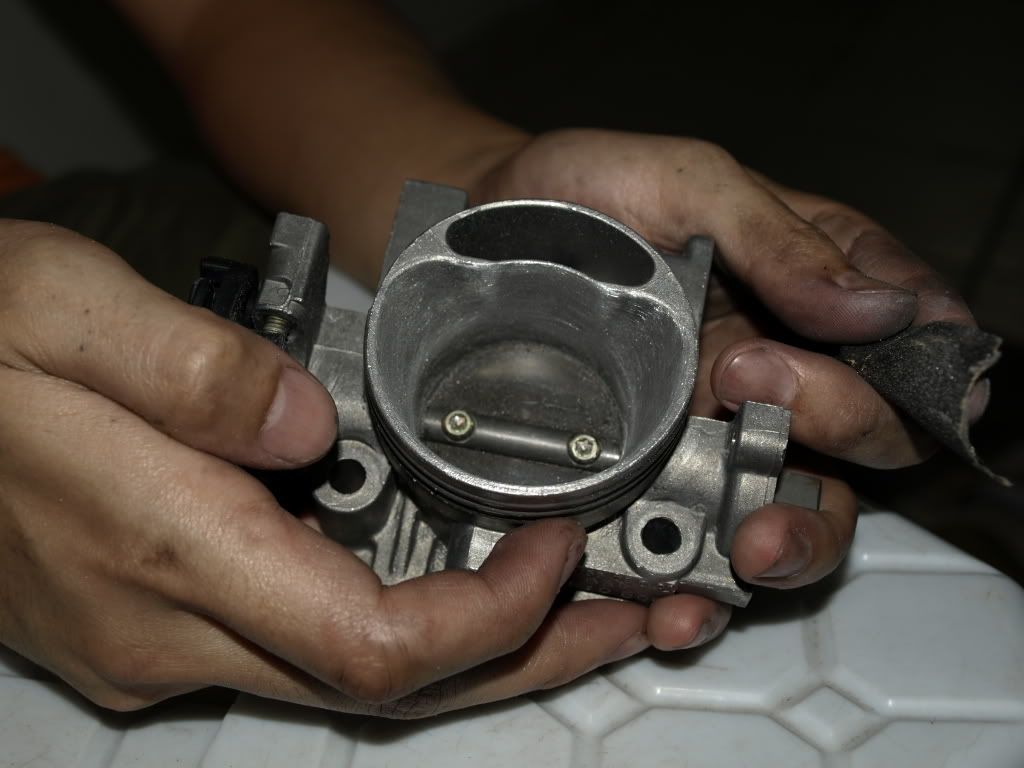
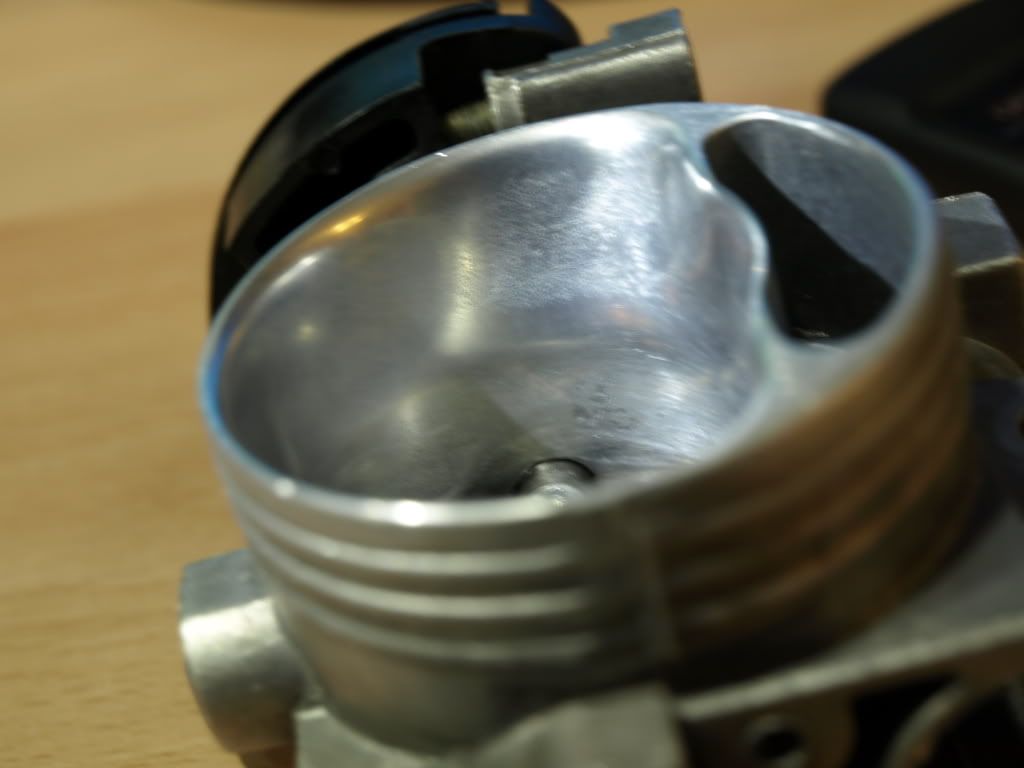
After sanding with the 100 grit...move to a finer grit and after each grit sanding spray it with the cleaner and start with another finer grit....the 1500 is to get rid of minor marks and the 2000 water sanding is to give it a mirror finish. Then use the autosol or ALU compound to further smoothen the surface...and you are done...
Important thing is DO NOT sand the part where the butterfly valve closes as it will make the intake diameter larger from the sanding process if you sand out the valve closing area it will mess up the idling also....the butterfly valve will need an impact wrench to take out as I don't have 1. I leave the butterfly valve intact. Opening it with a normal tool will damage the bolt head...which I did on 1....

NOTE: after the process, the 1st start up the engine rev will be higher for a few seconds, then it will settle back to the normal as the ECU is adjust the intake.
The result....sorry that I skip the other grit process pictures because I was trying to get it done in 1 night. Although the result was not too perfect but I'm happy with it as the whole inner side of the intake is smooth like chrome.....
Reassembly...Looks new and nice...

My TB was due for service since it's never been properly clean before..previous ways was just to spray some cleaner to clean it so I went back early after work to clean and PnP the TB myself.
What you need:
1. Engine cleaner or degreaser x 3 cans...any brand will do..I use to 3in1 cleaner with the lemon citrus scent but this cleaner is quite harsh on the hands....I skin was dried and itchy after I finish the job so better wear a glove...
2. Appropriate tools (depending on car make)...mine mostly are torque screw...
3. tooth brush
4. old cloth 3 pcs will do
5. a small container to soak some smaller parts in the cleaner.
6. old newspaper
7. Autosol or any mag or Alum polish or compound
8. sand paper..you will need a few grit...this is my choice
100
240
360
1500
2000
9. Lots of patience & elbow grease....
If you are not confident in using a Dremel to do the PnP this is the way...of course it's consumes a lot of time.
How the TB looks like before cleaning and PnP...dirty and the inner surface of the intake is rough and I saw some bumps here and there some ridges...
The cleaning process...before cleaning, take out all those sensors attached to the TB to thoroughly clean all the parts and the sensors.
The porting & polish process
Starting with the 100 grit. you can see all the sanded marks....use this 100 to sand out bumps and ridges...then work your way down to finer sand papers until all you feel is smooth surface. For the idle control tunnel..I just did some light porting as I don't want to mess up the idling
Close of view of after 100 grit sanding
After sanding with the 100 grit...move to a finer grit and after each grit sanding spray it with the cleaner and start with another finer grit....the 1500 is to get rid of minor marks and the 2000 water sanding is to give it a mirror finish. Then use the autosol or ALU compound to further smoothen the surface...and you are done...
Important thing is DO NOT sand the part where the butterfly valve closes as it will make the intake diameter larger from the sanding process if you sand out the valve closing area it will mess up the idling also....the butterfly valve will need an impact wrench to take out as I don't have 1. I leave the butterfly valve intact. Opening it with a normal tool will damage the bolt head...which I did on 1....
NOTE: after the process, the 1st start up the engine rev will be higher for a few seconds, then it will settle back to the normal as the ECU is adjust the intake.
The result....sorry that I skip the other grit process pictures because I was trying to get it done in 1 night. Although the result was not too perfect but I'm happy with it as the whole inner side of the intake is smooth like chrome.....
Reassembly...Looks new and nice...
Last edited:


 :top:
:top: