Hi guys,
Here is my first comission conversion I posted in this forum. It is requested by a fellow modeller... Cham2020 so Cham, this conversion is yours lah... :D
I recieve the package last Friday and I started working on it at 10.00pm the same day. There is not much different on the shape between the Evo 6 and Evo 6.5. Just the front bumper is different (this is what was informed to me lah). So, I get on with the conversion.
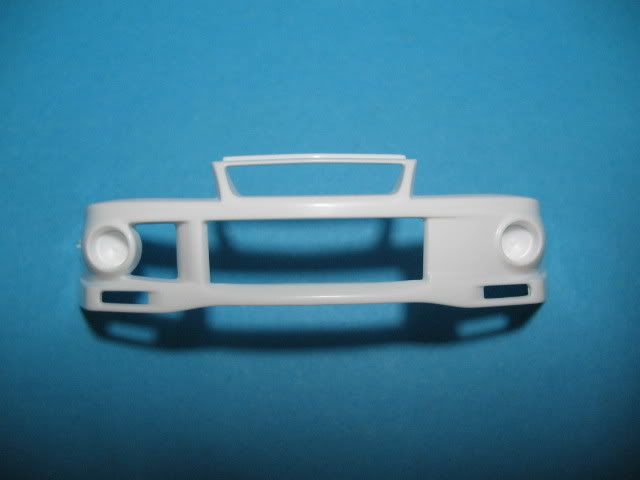
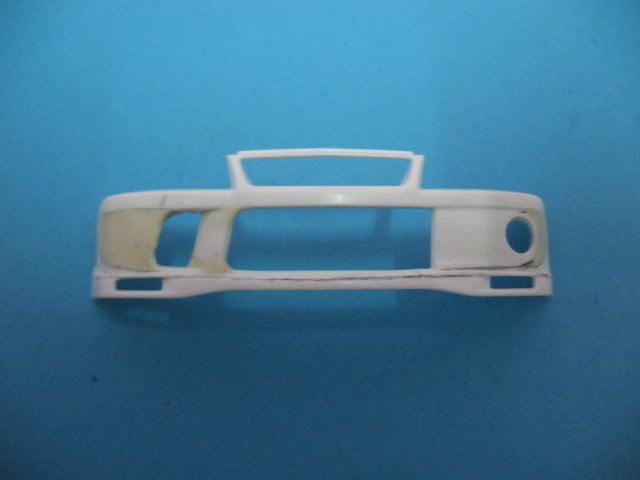
This is what I recieved in the package. A Tamiya 1/24 Evolution 6 front bumper.
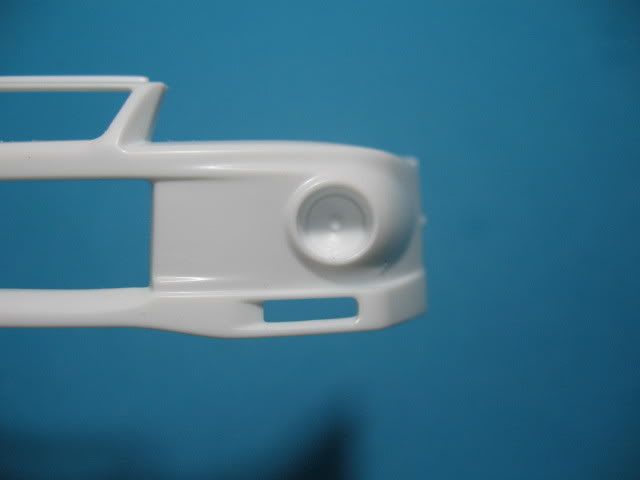
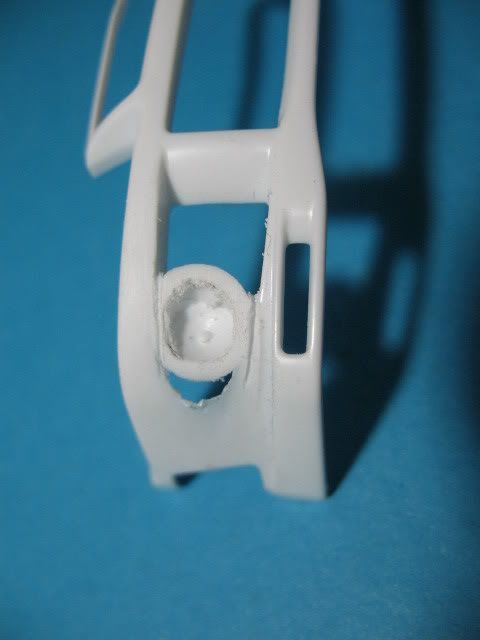
First thing I do is to remove the spotlight bulge on both sides of the bumper. I use the coarse file to remove it before cleaning it with sandpapers. This is what it looks like after filing.


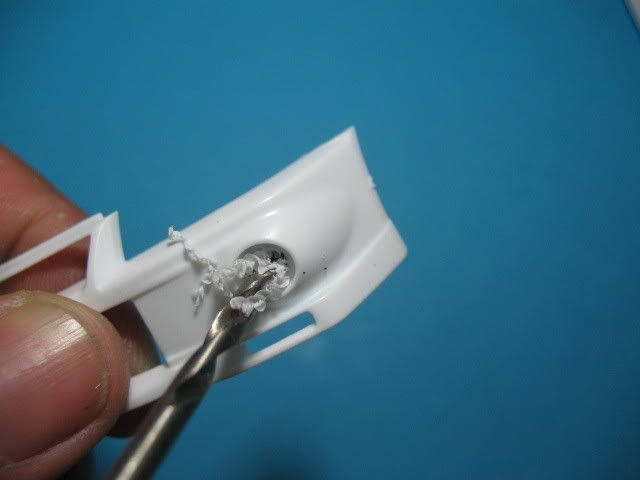
Now its time to add the intake hole (I think that what it is) on the other side of the bumper. From the reference picture the hole size looks about the same size with the spotlight and at the same location with the spotlight so the easiest part is to drill off the plastic at the location. The pictures below shows the process and the third picture is the end result before the bulge on that area is shaved-off.
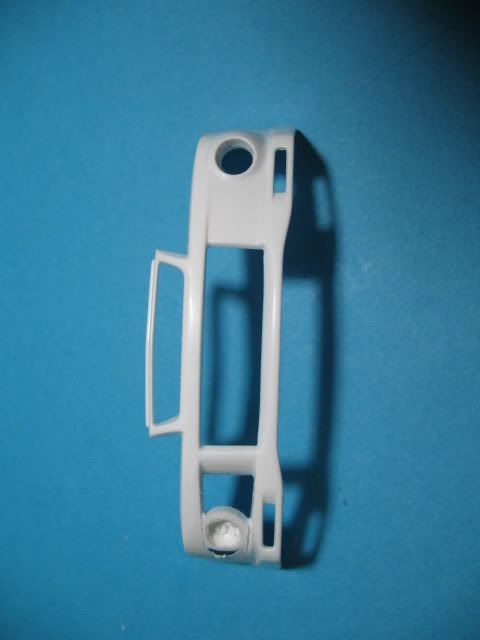
Since the right spotlight is not needed, I carefully scribe the lines and remove it.
Next... it's Bondite time!!!!... :lol:
Bump: Sorry because I have no progress picture on this. The bumper is filled with Bondite before the reshaping process begins. I glue a plastic sheet on the back of the areas that needs to be filled and when the glue is set, I use Bondite to cover the ares.
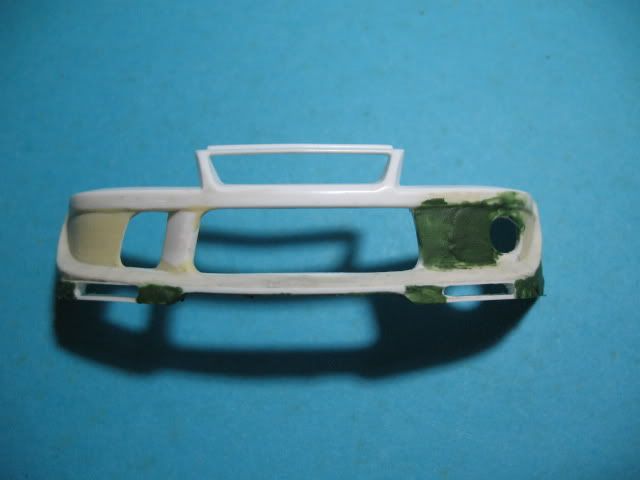
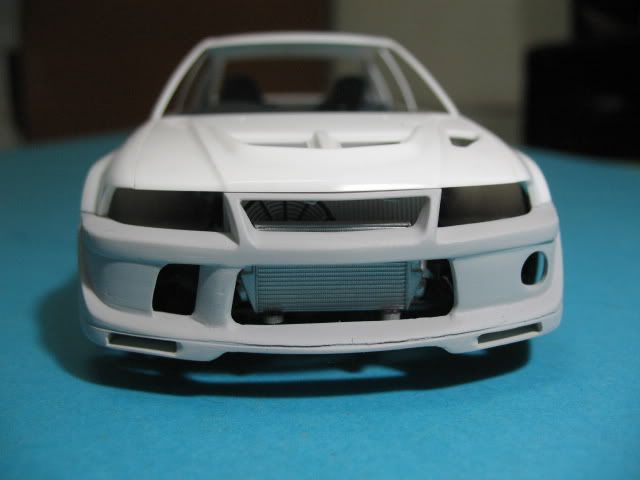
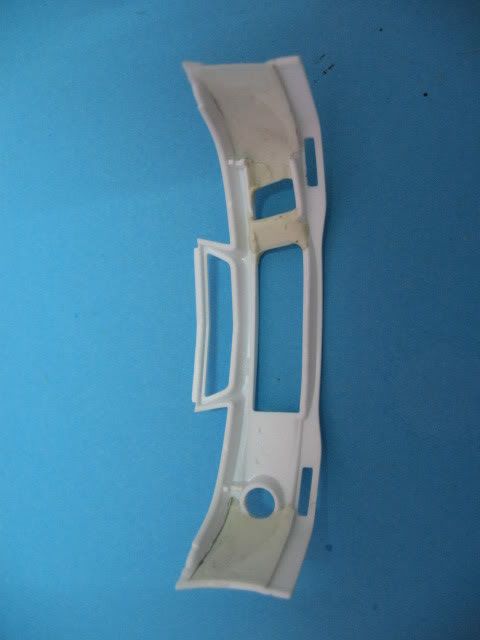
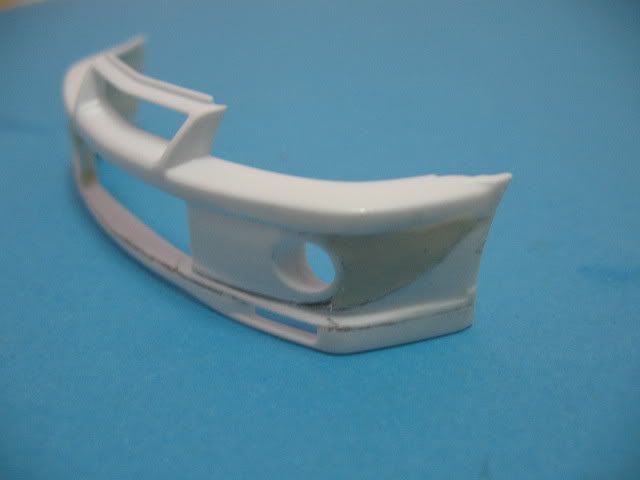
This is what it looks like as of last night.
The rear with the plastic sheet glued on so that I can control the amount of Bondite needed.
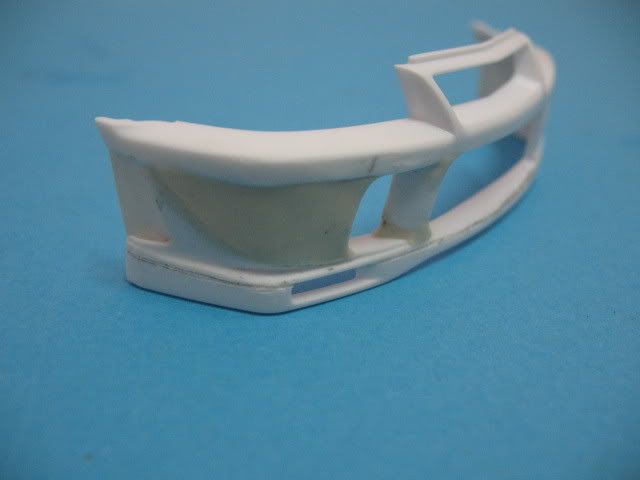
The right and left view of the bumper.
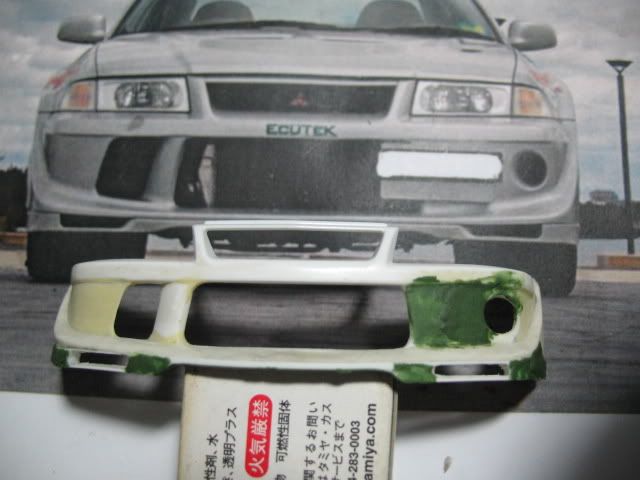
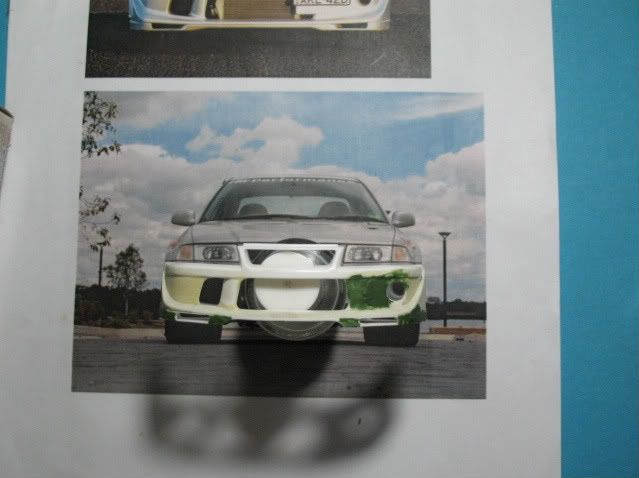
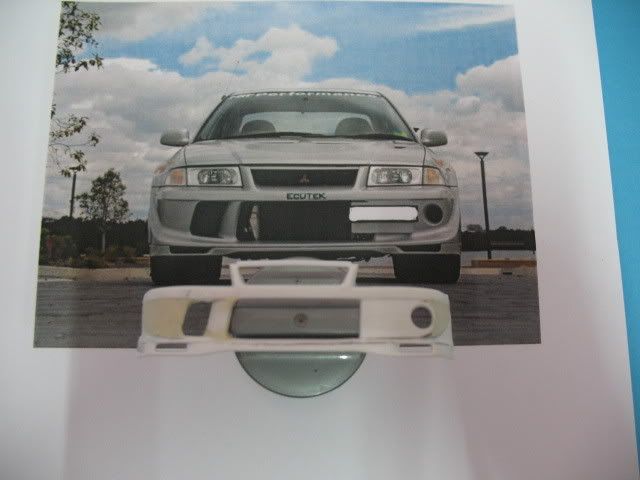
Looking from the reference picture, it looks pretty close don't you think?
All that is needed now is for me to clean up the Bondite work, add the lower skirting as per the TME and rebuild the side vents on the bumper. That will be tackled slowly.
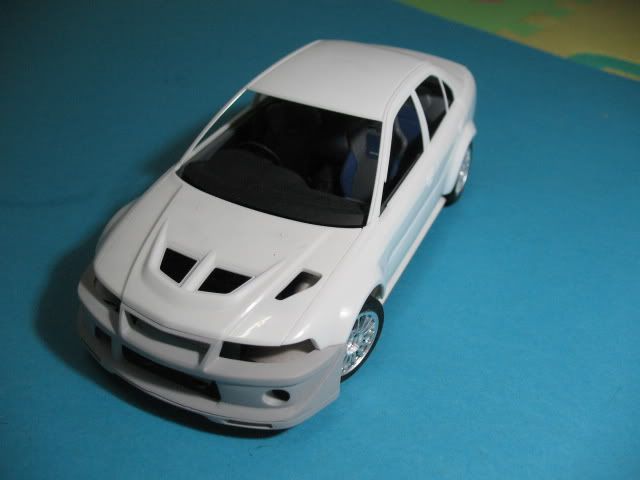
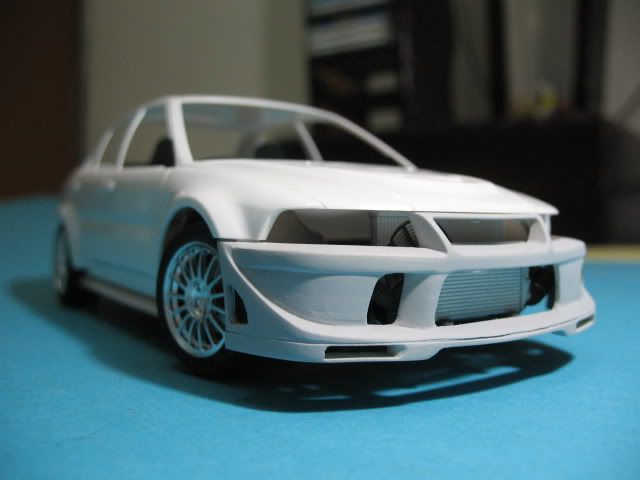
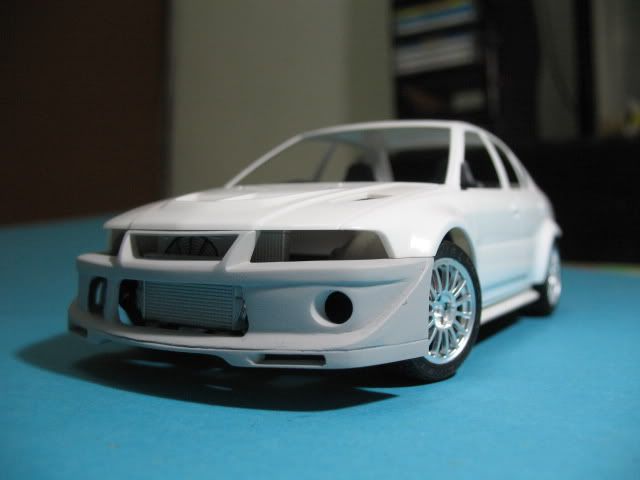
Bump: Oh yeah... some teaser pictures for you Cham... also for those wondering "what the hell is this guy building"... :lol:
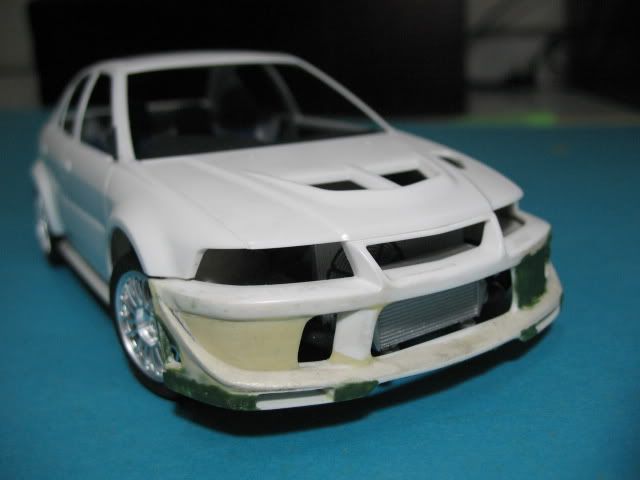
I have the Evolution 6 body that I will be converting into another Evolution version so, just for fun I dry fit the bumper to it... :D
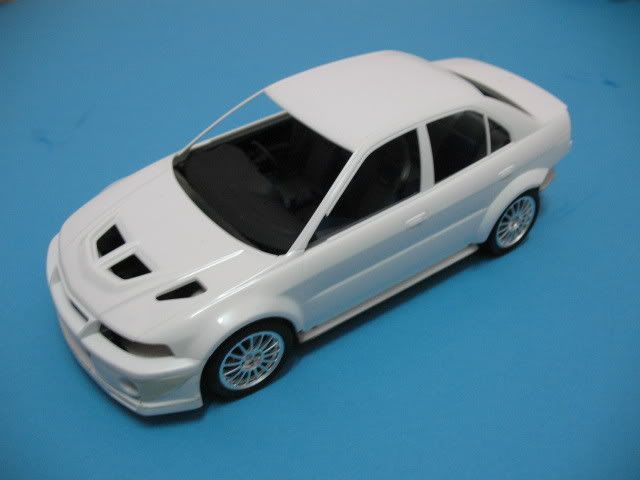
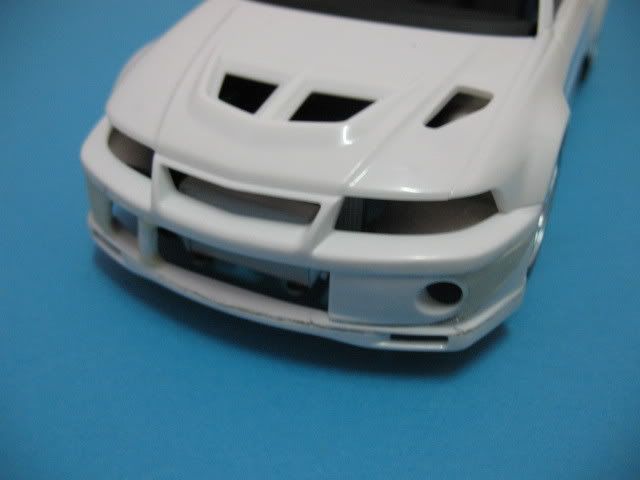
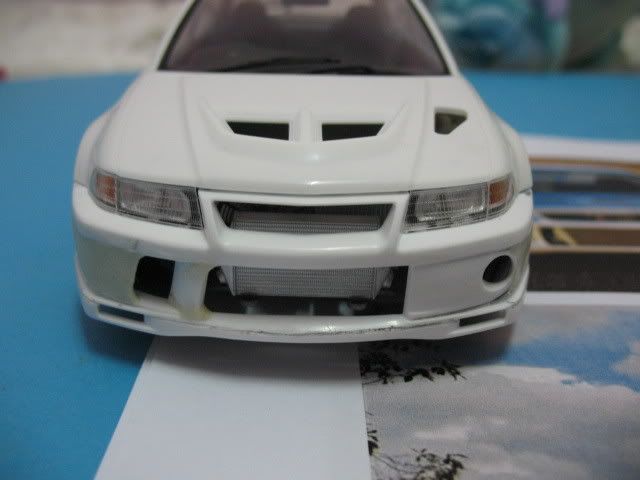
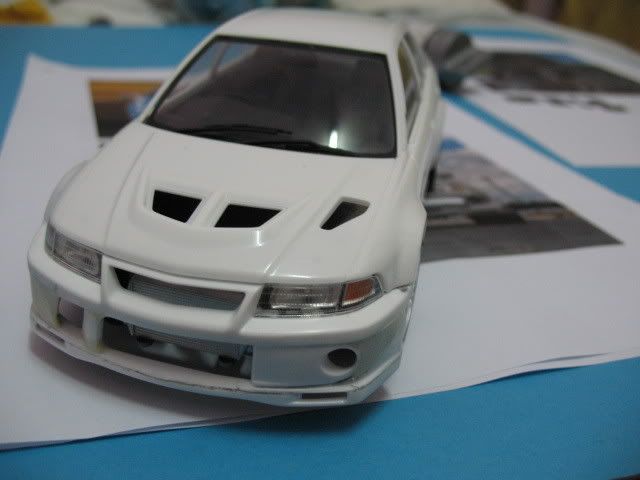
So, what do you think Cham???? :D
Guys, comments and suggestions please.. :)
Here is my first comission conversion I posted in this forum. It is requested by a fellow modeller... Cham2020 so Cham, this conversion is yours lah... :D
I recieve the package last Friday and I started working on it at 10.00pm the same day. There is not much different on the shape between the Evo 6 and Evo 6.5. Just the front bumper is different (this is what was informed to me lah). So, I get on with the conversion.
This is what I recieved in the package. A Tamiya 1/24 Evolution 6 front bumper.
First thing I do is to remove the spotlight bulge on both sides of the bumper. I use the coarse file to remove it before cleaning it with sandpapers. This is what it looks like after filing.
Now its time to add the intake hole (I think that what it is) on the other side of the bumper. From the reference picture the hole size looks about the same size with the spotlight and at the same location with the spotlight so the easiest part is to drill off the plastic at the location. The pictures below shows the process and the third picture is the end result before the bulge on that area is shaved-off.
Since the right spotlight is not needed, I carefully scribe the lines and remove it.
Next... it's Bondite time!!!!... :lol:
Bump: Sorry because I have no progress picture on this. The bumper is filled with Bondite before the reshaping process begins. I glue a plastic sheet on the back of the areas that needs to be filled and when the glue is set, I use Bondite to cover the ares.
This is what it looks like as of last night.
The rear with the plastic sheet glued on so that I can control the amount of Bondite needed.
The right and left view of the bumper.
Looking from the reference picture, it looks pretty close don't you think?
All that is needed now is for me to clean up the Bondite work, add the lower skirting as per the TME and rebuild the side vents on the bumper. That will be tackled slowly.
Bump: Oh yeah... some teaser pictures for you Cham... also for those wondering "what the hell is this guy building"... :lol:
I have the Evolution 6 body that I will be converting into another Evolution version so, just for fun I dry fit the bumper to it... :D
So, what do you think Cham???? :D
Guys, comments and suggestions please.. :)